Hockvill LCD Writing Tablet for Kids 8.8 Inch, Toys for Girls Boys Drawing Pad for 3 4 5 6 7 Year Ol...
$9.99 (as of May 28, 2025 22:55 GMT -07:00 - More infoProduct prices and availability are accurate as of the date/time indicated and are subject to change. Any price and availability information displayed on [relevant Amazon Site(s), as applicable] at the time of purchase will apply to the purchase of this product.)If you haven’t heard of a paper cootie catcher before, it’s time you know how much you’ve missed out on this childhood signature craft. I remember being in 4th grade…and again in 6th grade playing with handmade cootie catchers in the hallways. It was a fun way to pass the time. Making a cootie catcher was super easy, just grab a piece of paper, fold – fold – fold, write in some crazy options, then show it to your friends for a round of laughs and play. We’re going to draw a classic paper cootie catcher today! Why? Simply because this folded paper game is a very difficult shape and forms to draw out. It’s like origami because it’s a 3d folded paper object. There’s a lot of hidden shapes at every angle which makes it tricky to draw. Great practice for kids! A challenge is half the fun. So let’s start!
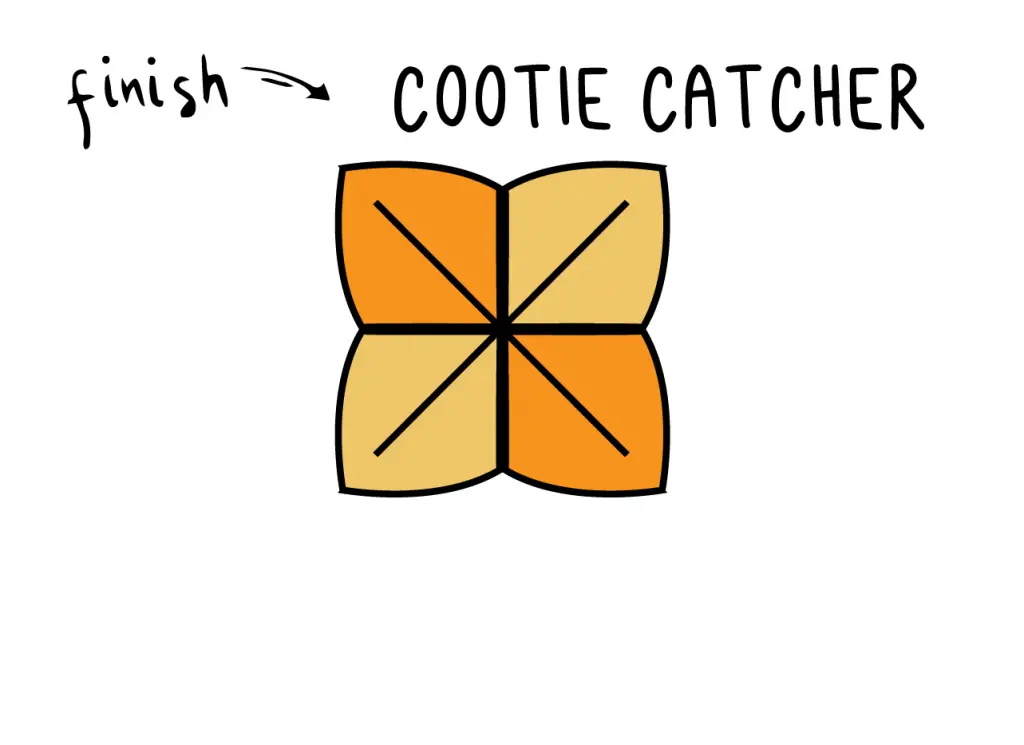
Note this is just one way to draw a cootie catcher. It’s one of the easier ways too. If you like it and want more, leave a comment below and I’ll draw some from different angles so your little one can practice 3d to 2d art.
And why not check out our collection of free coloring pages for kids! We update our resources library regularly so feel free to check back as we add more and more content. We’re currently at over 1000+ coloring pages and creating more how-to-draw stuff art tutorials!
Note: This tutorial and our many others are suitable for ages 3 to 10 (preschool and above.)
🖍️ Tools For Success
- Paper (Our Free How To Draw Template PDF)
- Pencil
- Polymer Eraser
- Outline Markers
- Coloring Tools (I recommend Crayola’s 140 Piece Coloring Case)
🎨 Parents: The only tools you need to use these how-to-draw tutorials are: an eraser, a pencil, and a piece of paper. But – if you have them around – a sketching pencil makes for fainter and softer lines that help kids build fine motor accuracy. I also recommend going over the sketch pencil with a black outline marker when you’re done for a neater finish. Lastly, erase the pencil marks before adding color.
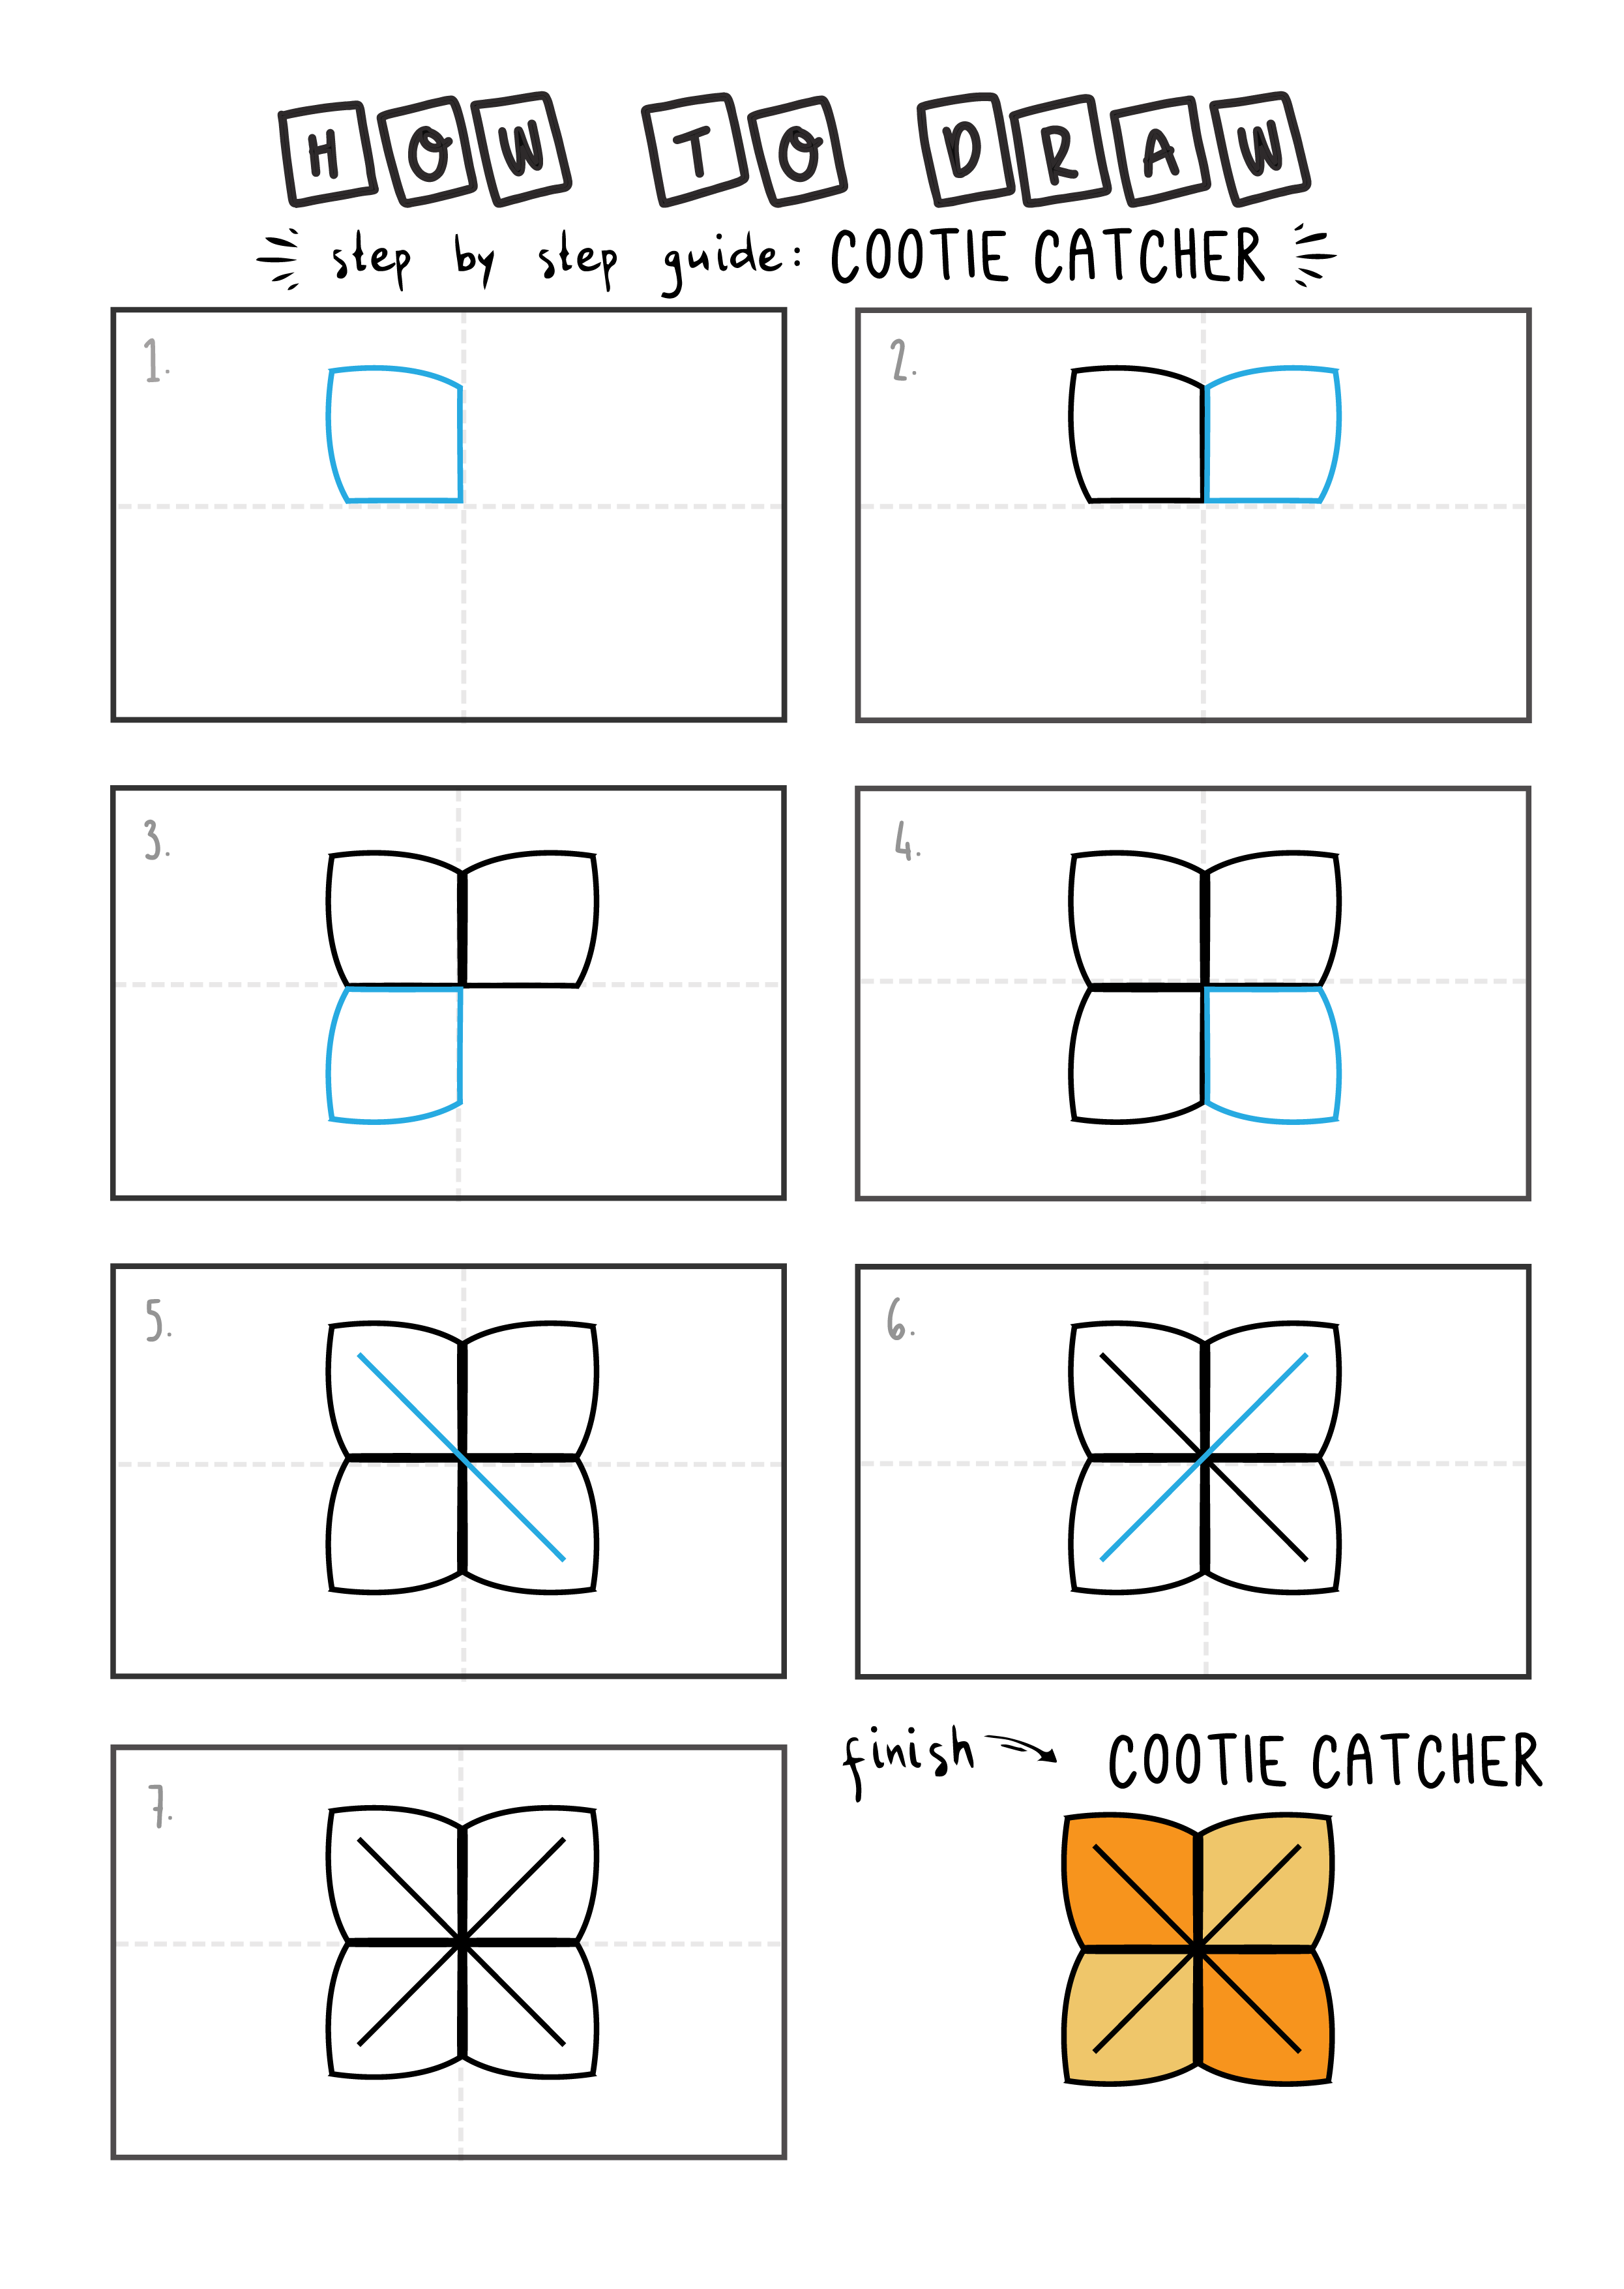
Step-by-Step Art Tutorial: Drawing a Cootie Catcher
- Draw a small square-like shape on the left top side of your paper. Take note that the square’s top and right sides are slightly embossed, making them curvy with a pointy end on the top right corner.
- Repeat step one for three times – one on the right side and another two below them. However, the embossed sides are not always the top and right sides. The embossed sides should be the outer sides of the small square-like shapes.
- It looks like a pillow with a tight rope in the middle, but it’s actually a cootie catcher! To make more look like one, let’s put two diagonal lines in the middle perpendicular to each other. The diagonal lines should be parallel to the outer corners of the cookie catcher.
- We can play with it! Just color it with any color you want, you can make it colorful, but I’ll make mine a yellow cootie catcher with darker shades on the upper left side and lower right side and lighter shades on the other sides.
~
🔖 See our collection of How-To-Draw tutorial instructions for young kids! Check out our collection of free coloring pages for kids while you’re here too. We’re a group of independent illustrators that create coloring pages, how to draw tutorials, craft printables, and educational worksheets for kids. We update our resource library regularly so feel free to check back as we add more and more content. We’re currently at over 1000+ coloring pages and 500+ how-to-draw stuff guides for kids!
~
🖍️ Tools For Success
Printing & Saving Instructions:
- Desktop & laptop users: the instant print button is in the upper left-hand corner.
- Mobile users: if you don’t see the instant print icon on mobile for whatever reason, toggle your mobile browser to “Desktop View” and you should be able to see it. You can find that in your web browser’s menu. Or find the nearest computer to print.
- Change the page orientation from horizontal or vertical depending on what fits best.
- To decrease load time we put images on different sub-pages. Use the navigation on the top and bottom of the galleries to toggle.
- Designed to fit both A4 size & U.S. standard letter size but preview your specs just in case.
- Want to save a file for later? Just hit the instant print button and choose instead to print, select Save As “PDF” in the drop-down selection, and done! (Your screen and selection might look a little different.)
🖍️ MORE HOW TO DRAW TUTORIALS…
Help Support Artists Big and Small
We would much appreciate it if everyone who enjoyed or benefited from our how-to-draw tutorial series can give us a social media shout-out or a link back. This will allow us to create more content by 1) commissioning small, independent artists and 2) teach young children everywhere to create more through art. Thank you.

